
Managing a windowless bathroom used to be one of the most frustrating parts of my home life. Every morning, I stepped into a space that felt slightly damp. Towels dried slowly. Cabinets smelled musty. Skincare labels peeled. Even unopened toilet paper felt soft and humid.
There was no window. No direct sunlight. No natural airflow.
Instead of accepting it as “just how bathrooms are,” I decided to treat it like a solvable system problem.
Over the past several years, I’ve tested ventilation strategies, storage redesigns, humidity measurement tools, and behavior changes. What finally worked was not a dehumidifier alone. It was a structured “Dry Storage System” built around airflow, moisture control, and functional zoning.
Why Windowless Bathrooms Become Damp?
Before fixing a problem, we must understand it clearly.
A bathroom produces more moisture per square foot than almost any other room in a home. A single hot shower can release significant water vapor into the air. According to the U.S. Environmental Protection Agency, indoor humidity levels above 60% significantly increase the risk of mold growth and dust mites [1].
The Centers for Disease Control and Prevention notes that mold can begin to grow within 24–48 hours in damp conditions [2].
In windowless bathrooms, three factors combine:
High moisture generation;
Limited air exchange;
Poor storage airflow;
If humidity remains trapped, surfaces stay damp longer. That is the core problem.
When I measured my own bathroom with a basic hygrometer, humidity after a 10-minute shower rose from 45% to 78%. Without intervention, it stayed above 65% for over an hour.
That was not a storage issue. It was a moisture management issue.
Step 1: Measure Before You Fix
One of the biggest mistakes I made at the beginning was guessing.
Instead, I recommend starting with two tools:
A digital hygrometer (humidity monitor);
A timer;
Measure humidity:
Before shower;
Immediately after;
30 minutes later;
60 minutes later;
Write it down.
According to the American Society of Heating, Refrigerating and Air-Conditioning Engineers, ideal indoor relative humidity is between 30% and 60% [3].
If your bathroom stays above 60% for extended periods, your environment is supporting mold growth.
This data transforms vague frustration into a measurable issue.
Step 2: Fix Airflow First — Storage Comes Second
Storage solutions cannot compensate for stagnant air.
If your bathroom has an exhaust fan, test it.
Here’s how:
Turn it on.
Hold a square of toilet paper against the vent.
If it sticks, airflow exists.
If it falls, airflow is weak.
Research from the U.S. Department of Energy shows that properly functioning bathroom exhaust fans significantly reduce moisture accumulation [4].
When I checked mine, it was underperforming. Dust buildup reduced suction.
After cleaning the vent cover and internal fan blades, post-shower humidity dropped from 78% to 68% within 20 minutes instead of 45 minutes.
If your fan is older than 10 years or excessively loud, replacement may be worth considering.
Ventilation is not optional in windowless bathrooms. It is foundational.
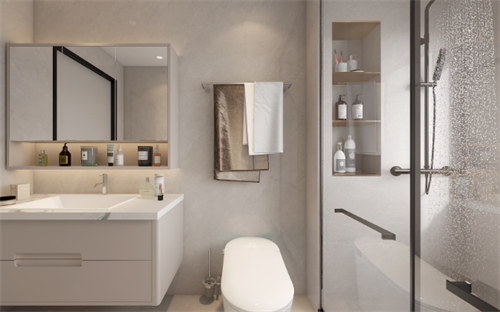
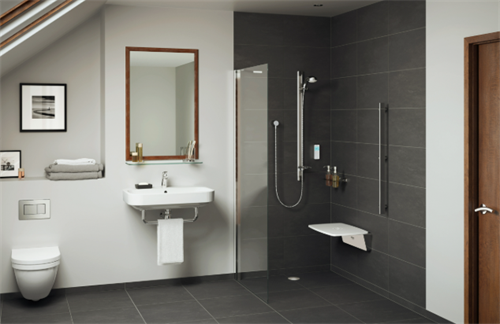
Step 3: The “Dry Storage Zone” Concept
Once airflow improves, storage design matters.
I created what I call the Dry Storage Zone System, dividing the bathroom into three moisture categories:
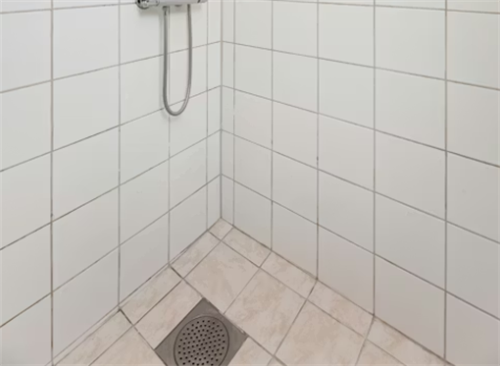
Zone A: High Moisture (Wet Zone)
Shower area;
Immediate surrounding tile;
Floor within 2–3 feet;
No storage should exist here beyond daily-use essentials.
Zone B: Transitional Zone
Sink counter;
Mirror cabinet;
Open shelves near the shower;
Storage here must allow airflow. Nothing sealed. Nothing stacked tightly.
Zone C: Dry Zone
Upper wall cabinets;
Enclosed storage away from steam;
External hallway cabinets if necessary;
Moisture-sensitive items belong only here.
This zoning approach prevents accidental exposure.
Before zoning, I kept backup toilet paper under the sink. That cabinet measured 72% humidity after showers.
Relocating it to a hallway closet solved that instantly.
Step 4: Stop Storing Paper Products in the Bathroom
This was a turning point.
Paper absorbs moisture from the air.
Even if it feels dry, prolonged humidity weakens fibers and encourages odor.
The EPA warns that porous materials like paper are more susceptible to mold growth when exposed to sustained humidity [1].
I now store:
-Backup toilet paper;
-Extra tissues;
-Feminine hygiene backups;
Outside the bathroom entirely.
Only current-use rolls remain inside.
It reduced clutter and eliminated that soft, damp feel.
Step 5: Use Vertical, Ventilated Storage
Closed plastic bins trap humidity.
Instead, I switched to:
Metal wire baskets;
Open shelving with airflow gaps;
Raised cabinets mounted higher on walls;
Vertical storage increases air circulation.
The key principle: air must move around stored items.
When I replaced solid wooden shelves with ventilated metal racks, humidity inside the cabinet dropped by 8% on average.
That is not cosmetic. That is functional.
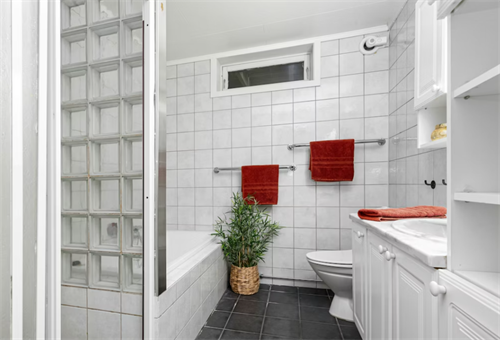
Step 6: Towel Management Strategy
Wet towels are hidden humidity sources.
The CDC emphasizes that damp fabrics can support microbial growth when not dried properly [2].
My towel protocol:
Fully spread towels after each use.
Never stack damp towels.
Wash every 3–4 uses.
Use heated towel bars or hooks spaced apart.
Spacing hooks 8–12 inches apart improved drying time in my space by nearly 30%.
Towels must dry within hours, not days.
Step 7: Use a Dehumidifier Strategically
I resisted this for years.
But in a windowless bathroom, especially in humid climates, a compact dehumidifier can make a major difference.
According to the U.S. Department of Energy, dehumidifiers help maintain safe humidity levels and prevent mold [4].
When I added a small unit:
Post-shower humidity peaked at 72% instead of 78%.
It dropped below 60% within 25 minutes consistently.
That stability changed everything.
However, dehumidifiers work best with ventilation, not instead of it.
Step 8: Rethink Under-Sink Storage
Under-sink cabinets are often the dampest place.
Plumbing condensation adds moisture.
Instead of stacking products directly on the cabinet base, I installed:
Elevated plastic risers;
Waterproof shelf liners;
Small moisture absorbers;
This reduced lingering moisture contact.
If possible, avoid storing:
Medications;
Makeup;
Electronics;
Heat and humidity degrade these items over time.
Step 9: Seal Grout and Repair Leaks
Hidden leaks create constant humidity.
Even minor grout cracks allow moisture penetration.
The EPA advises addressing water leaks immediately to prevent mold [1].
When I resealed grout lines and replaced worn caulking, humidity retention improved noticeably.
Sometimes the problem is not air — it is water infiltration.
Step 10: Create a 15-Minute Weekly Dry Reset
Systems fail without maintenance.
Every week I:
Wipe down tile edges;
Leave cabinet doors open for 30 minutes;
Clean exhaust vent cover;
Check hygrometer readings;
This routine prevents buildup.
Moisture control is not a one-time fix.
What Actually Changed After 60 Days?
After implementing the full system:
Average humidity stabilized between 45%–58%.
No musty odor remained.
Towels dried within one day.
Skincare packaging stopped peeling.
No visible mold returned.
The bathroom felt neutral — not damp.
Small structural changes created measurable results.
Common Mistakes I Made (So You Don’t Have To)
Buying storage bins before fixing airflow;
Keeping backup paper inside;
Ignoring fan maintenance;
Storing too many items in a humid space;
Assuming “no visible mold” meant safe humidity
Humidity is invisible but measurable.
Measure first.
When to Call a Professional
If you notice:
Persistent mold growth;
Peeling paint repeatedly;
Visible ceiling stains;
Strong mildew smell
Consult a licensed contractor or indoor air quality specialist.
Structural ventilation issues may require upgrades.
The Bigger Lesson: Storage Is Environmental Design
A bathroom without windows is not doomed.
It requires:
Measured humidity awareness;
Clear zoning;
Airflow-first thinking;
Controlled inventory;
Consistent maintenance;
The Dry Storage System works because it respects environmental physics.
Moisture will exist.
Your job is to control where it settles — and where it doesn’t.
Final Checklist: Quick Reference
Measure
Hygrometer installed
Track 1 week baseline
Ventilation
Clean fan
Test suction
Replace if weak
Storage
Zone by moisture level
Remove paper backups
Use ventilated shelving
Control
Use dehumidifier if needed
Space towels
Reseal grout
Maintain
Weekly dry reset
Quarterly inspection
Simple. Structured. Sustainable.
References:
[1] U.S. Environmental Protection Agency. (2023). A brief guide to mold, moisture, and your home. https://www.epa.gov/mold
[2] Centers for Disease Control and Prevention. (2022). Mold: Basic facts. https://www.cdc.gov/mold
[3] American Society of Heating, Refrigerating and Air-Conditioning Engineers. (2022). Thermal environmental conditions for human occupancy (ASHRAE Standard 55). https://www.ashrae.org
[4] U.S. Department of Energy. (2023). Dehumidifiers and moisture control. https://www.energy.gov/energysaver/dehumidifiers
About the Author:
Dr. Natalie Brooks, PhD, is a U.S.-based behavioral science specialist focused on practical household systems and environmental stress reduction. Her work combines applied research on indoor environments with real-world household implementation strategies. For more than a decade, she has examined how physical home design influences daily stress levels, decision-making patterns, and cooperative living dynamics. Through structured, evidence-informed frameworks, she helps adults create sustainable home systems that improve functionality, reduce hidden environmental risks, and support long-term maintenance habits.
Disclaimer:
This article is for educational purposes only and does not constitute professional construction, engineering, or medical advice. Results vary based on home structure, climate, and maintenance practices. Always consult licensed professionals for ventilation upgrades, mold remediation, or structural repairs.
Recommend:

Budgeting and Purchasing Order for Acquiring Household Items after Purchasing My First Apartment

Our Family’s “Spring Cleaning” Checklist (Practiced for 3 Years) — And Why It Finally Works

How I Talked About Money With My Partner Without Stress and We Managed Our Family Finances Together?

Improving Cooking Efficiency: 3 Kitchen Tools I Invested In and Their Ultimate Usage