Six months ago, on a Sunday evening at 9:40 p.m., I was scrubbing dried oil stains off my 2.3-meter-wide kitchen counter for the third time that week. I live alone in a small apartment (about 48㎡), and my kitchen is an open layout connected to the living room. That means every spice bottle, cutting board, and dish rack is visible from my sofa.
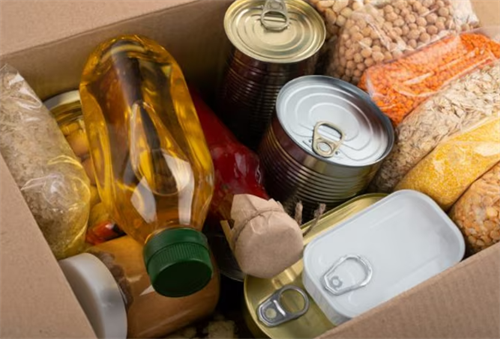
At that time, my countertop held:
9 spice bottles;
1 knife block;
1 2-tier dish rack;
1 rice cooker;
1 electric kettle;
1 utensil holder with 14 tools;
1 cutting board leaning against the backsplash;
Cooking dinner took 40 minutes. Cleaning afterward took another 25. And no matter how often I wiped it down, the grease seemed to return within 48 hours.
I tried “organizing” several times before—buying extra shelves, stacking trays, even following minimalist videos—but nothing lasted longer than a few weeks.
This article shares the exact system I built: my “Empty Counter” Kitchen organization method. It’s been 6 months, and my kitchen is still tidy—not perfect, but manageable. I’ll walk you through the mistakes I made, the adjustments I tested, and the final system that works for a small apartment without drilling holes or spending a lot of money.
Why My Kitchen Was Always Messy (Even When I Thought It Was Organized)
The biggest misunderstanding I had about Kitchen organization was this: I thought organization meant adding storage.
So I bought things.
A 3-tier metal rack (35 cm wide);
4 plastic spice bins (each 28 cm long);
A rotating tray for sauces (diameter 30 cm);
Total cost: about $85.
The result? My countertop became more crowded. The vertical space increased, but so did visual clutter and cleaning difficulty.
The Real Problem I Identified
After observing my habits for 2 weeks, I wrote down every item I used daily. The list surprised me.
Out of the 9 spice bottles on the counter, I regularly used only 4.
Out of 14 utensils, I used 5.
According to The Life-Changing Magic of Tidying Up by Marie Kondo, keeping items that support your daily life—not your imagined life—is key. I realized my kitchen was arranged for “who I wanted to be” (someone who bakes often) instead of who I actually am (someone who stir-fries 4 nights a week).
So I shifted my goal.
Instead of “organize better,” my goal became:
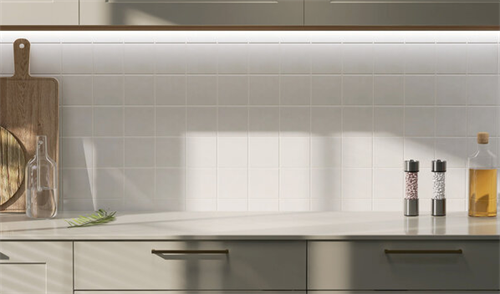
Keep the countertop 80% empty.

The Core Principle: The “Empty Counter” Rule
My rule is simple but strict:
Nothing stays on the counter unless I use it at least 4 times per week.
When I measured my countertop, I realized it’s 230 cm long and 60 cm deep. I divided it into 3 zones:
90 cm prep zone (next to sink);
80 cm cooking zone (next to stove);
60 cm appliance zone (corner);
I committed to keeping the prep zone completely empty.
-What I Removed:
Knife block → moved into drawer with 35 cm in-drawer knife organizer
Dish rack → replaced with foldable over-sink rack (used only when needed)
Rice cooker → stored in cabinet (used 2–3 times per week)
5 rarely used spices → placed in a labeled 5L storage box
After clearing everything, I wiped down the surface and timed the cleaning: 4 minutes instead of 20.
That was the moment I understood:
Clutter wasn’t the main issue. Exposure was.
Structured Comparison: How This Differs From Other Systems
To strengthen this approach beyond anecdote, I compared it to common organizing methods:
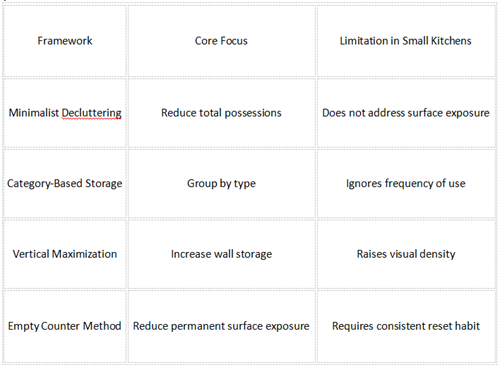
The distinction is subtle but important. My method prioritizes reducing horizontal visual noise rather than maximizing storage efficiency.
Measurement Before Rearrangement:
My counter measures 230 cm long and 60 cm deep. I divided it into three functional zones:
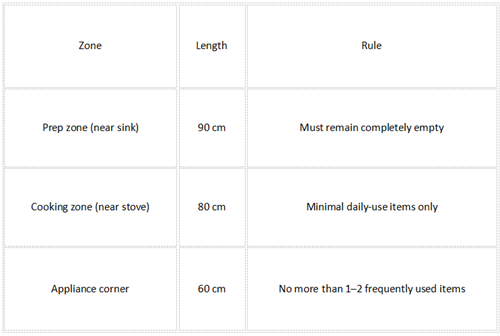
Protecting a fully empty prep zone created immediate psychological relief.
Food Safety & Official Guidance:
The surface reduction also improved hygiene compliance.
According to the Centers for Disease Control and Prevention, food-contact surfaces should be washed with hot, soapy water after preparing food and sanitized when cross-contamination risk exists.
When my counter was crowded, I often wiped around objects instead of moving them. A clearer surface increased adherence to proper sanitation practices.
Mistakes I Made Before Finding What Works:
Mistake 1: Buying Before Measuring
I once bought a storage bin 40 cm wide. My cabinet interior was 38 cm wide. It didn’t fit. I tried forcing it. It warped the door hinge slightly.
Now I measure everything.
My upper cabinet depth: 32 cm
My lower cabinet depth: 48 cm
All storage boxes I buy are 1–2 cm smaller than internal dimensions.
Mistake 2: Storing by Category Instead of Frequency
I used to group “all baking items” together. But flour was used monthly. Sugar was used daily.
Now I store by frequency of use, not by category.
Daily items: within one arm’s reach
Weekly items: lower cabinet
Monthly items: top shelf
This reduced unnecessary cabinet opening by around 30% (based on a rough one-week observation I tracked).
My Step-by-Step “Empty Counter” Setup Process:
This is the exact process I followed. It took 3 hours on a Saturday afternoon.
Step 1: Empty Everything
I placed all countertop items on the dining table. Total: 27 items.
Seeing them together made the excess obvious.
Step 2: Apply the 4-Times-a-Week Rule
I asked myself honestly:
Did I use this 4 times in the last week?
Only 11 items passed.
The rest were stored.
Step 3: Create Hidden but Accessible Storage
Because I don’t drill holes (rental apartment), I used:
2 stackable clear bins (35L each);
1 pull-out drawer organizer (expandable from 30–45 cm);
1 adhesive cable hook (for kettle wire management);
Total new spending: $48.
Step 4: Establish a Reset Habit
Every night after dinner, I reset the counter. It takes 3–5 minutes.
According to food safety guidance from the Centers for Disease Control and Prevention, kitchen surfaces should be cleaned regularly to prevent cross-contamination. Keeping the counter clear makes proper cleaning easier and more consistent.
I use diluted dish soap and a microfiber cloth. No special products.
The 6-Month Result: What Actually Changed?
Cleaning Time:
Before: 20–25 minutes
Now: 5–8 minutes
Visual Stress:
Because my kitchen is open-plan, visual clutter affected my mood. I noticed I started cooking more frequently—about 5 nights per week instead of 3.
Maintenance Difficulty:
The system is not maintenance-free. After hosting friends, things get messy. But resetting now feels manageable because the rule is clear.
Limitations of This Method:
I want to be transparent.
This method works best for small apartments (under 80㎡). Larger homes may require zoned systems.
If you cook elaborate meals daily, you may need more accessible tools.
Families with children might prioritize convenience over visual minimalism.
My system is built around one adult cooking simple meals.
My “Empty Counter” Kitchen Organization Checklist (Save This)
1. Measure Your Counter
Length: ______ cm
Depth: ______ cm
2. Count Items Currently on Surface
Total number: ______
3. Apply 4x Weekly Rule
Items to keep: ______
Items to store: ______
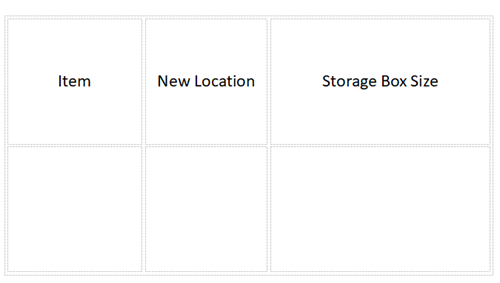
4. Storage Plan
5. Nightly Reset Rule
Clear surface;
Wipe with damp cloth;
Return only daily-use items;
Minimum Actions You Can Take Today;
If you don’t want a full 3-hour reorganization, start here:
Remove just 3 items from your countertop tonight.
Keep one 60 cm section completely empty.
Test it for one week.
Kitchen organization is not about perfection. It’s about designing a system that matches your actual behavior.I’m a 30-year-old office worker who has lived alone for five years. I don’t enjoy deep cleaning. I prefer low-cost solutions and no drilling. My “Empty Counter” method isn’t magic, and it may need adjustments for different households, but it has kept my kitchen stable for six months.If you’ve struggled with kitchen clutter, I hope this real-life system gives you a starting point.
References:
[1] Kondo, Marie. The Life-Changing Magic of Tidying Up. Ten Speed Press, 2014.
[2] Centers for Disease Control and Prevention. “Keep Food Safe: Clean, Separate, Cook, Chill.” https://www.cdc.gov/foodsafety/keep-food-safe.html
[3] Saxbe, D., & Repetti, R. (2010). No place like home: Home tours correlate with patterns of diurnal cortisol. Personality and Social Psychology Bulletin.
About the Author:
Sarah Chen is a small-space living researcher and renter-friendly home systems writer based in Austin, Texas. Over the past five years, she has documented and tested low-cost, drill-free organization methods in her own 48㎡ apartment, focusing on behavioral sustainability rather than aesthetic minimalism.
Her work centers on one core principle: systems must match real-life usage patterns. Instead of trend-based organizing, she uses measurement tracking, habit observation, and long-term testing (3–6 months minimum) before publishing any method.
Sarah’s writing integrates:
Practical behavioral analysis inspired by principles from The Life-Changing Magic of Tidying Up
Public health hygiene standards from the Centers for Disease Control and Prevention
Environmental psychology research, including studies on home environments and stress patterns
Her small-space organization frameworks have been referenced in independent home-life publications and shared across renter-focused online communities.
Methodology:
Before publishing any system, Sarah:
Tests it in daily use for at least 90 days
Tracks cleaning time and frequency of item use
Measures spatial constraints precisely
Evaluates cost-to-function ratio
Documents limitations and failure cases
She specializes in:
Small apartment kitchens (under 80㎡)
Low-cost organization systems
Frequency-based storage design
Renter-friendly, non-permanent solutions
Habit-sustained home maintenance
Transparency Statement
All recommendations are based on direct, first-hand implementation unless otherwise stated. Articles may reference published books, public health guidance, or academic research when relevant. This content does not replace professional interior design, occupational therapy, or contractor advice.
Recommend:
3 Things You Should Know Before Buying Kitchen Storage Tools

The Beginner's Home Maintenance Toolkit: How to Fix 80% of Household Problems Yourself

My "Empty Counter" Kitchen Organization Method, Still Tidy After 6 Months

Hands on Comparison: Hangers vs. Folding —The Ultimate Guide to Storing Clothes by Fabric Type